Roger-Wilco-66
213 Watchers805 Deviations
25.1K
Pageviews Journals14
Newest
Among several other aspects, the medium format (6x6, 6x7...) itself has one big advantage over smaller formats. The photographer can put a considerable emphasis on a subject by working with the very small depth of field aperture settings. If you follow that line, you better know your lenses. The Mamiya RZ lenses have a lever that can stop down to the preferred aperture and visually check the DOF, however, that does not always help due to the darkness of the focusing screen when you close the aperture. The Mamiya lenses also have a little slide ring that can be adjusted (aperture/distance) that show the DOF, but it is relatively coarse. So it's always better to know in advance what you can expect from your lens, and swap them if necessary. There are three main aspects of depth of field that I try to keep in mind for the main lenses I use:
- hyperfocal distances (min, medium, max aperture)
- DOF at open aperture at 5 meter focus. The 110mm/f2.8 has a DOF of around 140cm here.
- DOF at open aperture with an extended focusing bellows at around 4.5ft / 1.5meters distance (typical close up). At that distance the DOF with the 110mm/f:2.8 is only a few centimeters, around +- 6cm!
Now, for my working horse lens, the 110mm f:2.8 lens I have these values pretty much memorized. This is a great lens and but has to be respected because of it's shallow DOF capabilities. But what if you need precision? What about the other fixed focus lenses?
I tried to use smart phone DOF calculators, but gave up on them. Too hard to read on bright sunny days, and I loath fumbling around with the phone while photographing. I tried to print charts, but they only gave hyperfocal values. Important enough, but the object distance is equally important, if not more. A few days ago I found a slide rule type calculator on the net, which is pretty nifty and also works for other formats than 6x7, from 35mm up to 8x10 large format.
For those who are interested, here it is:
nomographics.com/web/resources…
Now I have to figure out how to put it together in a sensible way (Smile)")
Best,
Mark
- hyperfocal distances (min, medium, max aperture)
- DOF at open aperture at 5 meter focus. The 110mm/f2.8 has a DOF of around 140cm here.
- DOF at open aperture with an extended focusing bellows at around 4.5ft / 1.5meters distance (typical close up). At that distance the DOF with the 110mm/f:2.8 is only a few centimeters, around +- 6cm!
Now, for my working horse lens, the 110mm f:2.8 lens I have these values pretty much memorized. This is a great lens and but has to be respected because of it's shallow DOF capabilities. But what if you need precision? What about the other fixed focus lenses?
I tried to use smart phone DOF calculators, but gave up on them. Too hard to read on bright sunny days, and I loath fumbling around with the phone while photographing. I tried to print charts, but they only gave hyperfocal values. Important enough, but the object distance is equally important, if not more. A few days ago I found a slide rule type calculator on the net, which is pretty nifty and also works for other formats than 6x7, from 35mm up to 8x10 large format.
For those who are interested, here it is:
nomographics.com/web/resources…
Now I have to figure out how to put it together in a sensible way
Best,
Mark
Join the community to add your comment. Already a deviant? Log In
From Analog Negatives to Digital Art
6 min read
From Analog Negatives to Digital Art: A Short Overview of a Technical Solution
I've had quite a few inquiries on how I scan my analog photos and which scanner I use. A lot of people were surprised, if not bewildered when I answered that, for monochrome negatives, I don't use a scanner at all.
In the moment, I use a Sony Alpha 77 DSLR with a Tamron 60mm Macro for DSLR digitzing. Generally, I would say any good DSLR with a large sensor (megapixels really count here!) is good. A good macro lens is essential because of the close distance to the negative. It must be good if you want to make 2 or 4 (or more) shots of a single negative, because distortions or unsharpness on the edges absolutely lead to bad results.
For backlighting, I employ a 19" computer lcd monitor that is lying on it's back side (by pure luck the one I use is perfectly flat and parallel to the front). I took the LCD panel out, as well as all the polarizing and fresnel sheets behind the panel. Only the diffusor sheet remains. I put a thin glass plate over the monitor that covers the whole top. This eases handling and prevents the diffusor sheet from being scratched or collecting dirt/dust. Cost: Zero. A good, professional light box can also be used, but it needs a color temperature controlled light source that has an even emmitance over the spectrum (some cheap LED types don't do well in that regime) .
The camera is mounted on a Kaiser enlarger stand, which is rock solid. I took the enlarger head off and mounted a repro adapter from Kaiser instead. Instead of the repro adapter (expensive) one can use an own creation made of a cheap sliding camera rail, but that places the camera off the table center towards the support stand. This limits the use for max. 4x5. The repro adapter reaches farther to the center of the table, upon which the backlight monitor is placed.
6x7 negatives are usually digitized with two shots. The camera is set up for manual exposure. I use f:8 to f:11 for a bit more DOF to counter out of DOF wandering of slightly warped negatives. Exposure time is determined by analyzing the histogram (the Sony does that in real time). This is essential for good results, because you want to capture as much of the dynamics of grey tones as possible and keep the histogram curve within the recordable bounds. You will notice that many negatives will deliver more than the camera sensor can catch, so you'll need to find the sweet spot. Experience teaches that eventually. Focusing is also manual / uncoupled. The Sony displays red marks that visually show when sharp contrasts correlate with a on spot focus. Also a non flickering green center mark signals a perfect focus. All shots are saved in the RAW format, of course.
The glass plate negatives just sit on the backlight box, of course. 6x6 and 6x7 are in a nifty digitizer frame called "Digitaliza". This tool works quite well and I can recommend it. For larger film negs like 4x4 /9x12 I use strips of cut glass to hold down the edges and prevent warping. All negatives are digitized with the emulsion side facing upwards to the camera. This is better for the sensitive emulsion because no physical contact can scratch it and the results are better because you are not capturing through the clear film base. I never handle negatives with bare hands and wear protective gloves. I use special laboratory type compressed air bottles for a quick blow to remove dust or lints prior to digitizing. I'm careful not to spray the propellant on the negatives and only deliver short blows.
After digitizing, I merge the usually two halves of the negatives in Photoshop. This usually works fine, but it can be problematic when you have large unstructured parts (grey sky or black) in the areas that merge. That can throw off the merging algorithm and you might need to move the camera a bit further away or use a single shot. Two exposures per negative result in a ca. 50 megapixel image with the camera I use. After cropping the excess it usually results in a 40MP rendition. This does not at all cover the resolution a sharp 6x7 photo with what, say, an Ilford Delta Pro 100 can produce! But it is more enough for the web and it is fun to explore these huge photos. Besides that, you have plenty of space to crop or choose compositions.
Next in the workflow is checking the focus. I do that by searching for lints or dust specs. Normally a nuisance, they are welcomed here because if they show up nice and crisp I know that my recording focus was spot on and any unsharpness is within the analog exposure.
Further work after merging in Photoshop is done: convert to 16bit, convert to grayscale, rotate, mirror horizontal, and then use the CF Systems ColorPerfect plugin to convert the negative to a positive. I could elaborate on why I use this plugin, but that would be too much for this article. Just check www.c-f-systems.com/Plug-ins.h… if interested.
After that I clean up the negative by stamping out the lints, dust specs or other anomalies. Then I save it as PSD and do the rest of the post processing and archiving in Lightroom. Here I straighten and crop the photo, if necessary, as well as make little changes to brightness and contrast. You also can determine by analyzing the histogram, checking if the distribution of the grey tones is OK and no values exceed or don't reach the bounds. I usually adjust the blacks and whites so that areas that should be exactly in the range of these values (maximal / minimal zone according to the zone system) deliver the RGB value accordingly. Can't trust any monitor for that by just looking at it. Sharpening is of very little use. You only make the grain sharper at higher settings, which looks ungainly and can produce weird artifacts. After all has been done I export the capture as JPEG.
All in all, compared to a full resolution scan, this method is very fast, you have full control over the resolution, and can digitize almost anything from 35mm to huge glass plates in a very good quality.
Join the community to add your comment. Already a deviant? Log In

Join the community to add your comment. Already a deviant? Log In
Monitors
1 min read
Finally, after years of agonizing if I should do this, I got myself a good monitor (Asus PA279Q "ProArt" <-- Art is always good )
Pro: The most stunning colors I have ever seen on a monitor, also the monochrome photos look better. The monitor has a very high color reproduction: 99% Adobe RGB, 100% sRGB, and 120% NTSC. Also, the WQHD resolution is great when working with highres photos.
Con: Darn! On a calibrated monitors most of my photos look way off, too dark mostly. Seems like I have a long and tedious job of adjusting to do. The photos, of course
Oh well, can't have it all, it seems.
Cheers,
Mark
Join the community to add your comment. Already a deviant? Log In
Back in town
1 min read
After a five week trip through Sri Lanka we're back again. We loved it in "the land of the smiles" and already miss it dearly.
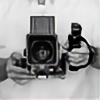
Took the Mamiya "beast" along, of course, and exposed around 30 films. The film rolls are processed now and I'll be spending the next few months picking out the good ones and getting them ready for displaying.
Cheers,
Mark
Took the Mamiya "beast" along, of course, and exposed around 30 films. The film rolls are processed now and I'll be spending the next few months picking out the good ones and getting them ready for displaying.
Cheers,
Mark
Join the community to add your comment. Already a deviant? Log In